
外观
AMP 出厂示例
本文将详细介绍如何通过使用 RPMSG ( Remote Processor Messaging ), 在 Linux 与 RT-Thread 操作系统之间进行多核异构核间通信。目的是帮助用户掌握 RPMSG 模块的使用流程。
RPMSG
RPMSG( Remote Processor Messaging )是一种基于共享内存的进程间通信(IPC) 机制,它允许在非对称多处理( AMP ) 系统中的不同处理器核心之间进行通信。 这些核心通常运行着完全独立的操作系统(例如,一个核心运行 Linux,另一个运行实时操作系统如 RT-Thread 或裸机程序
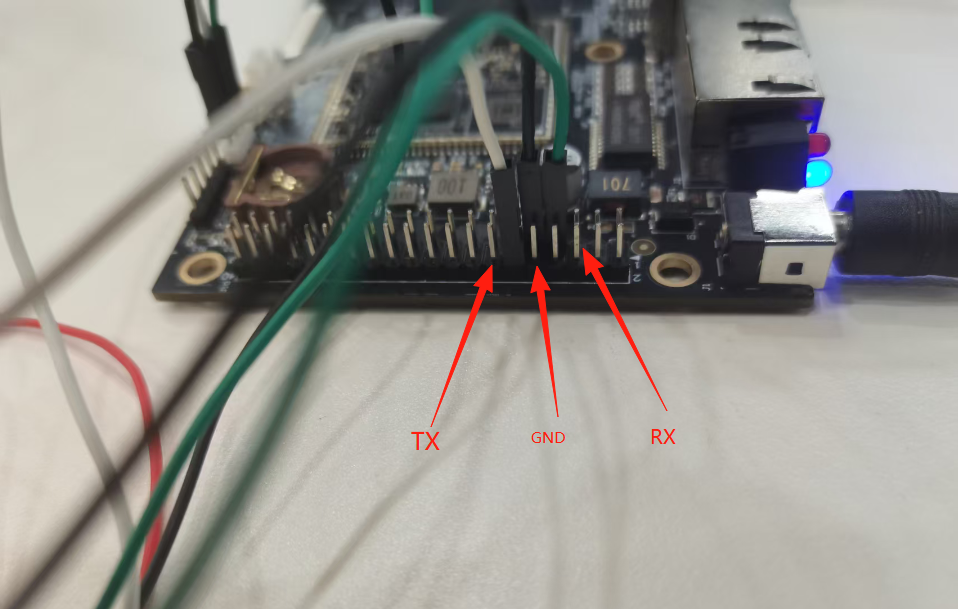
硬件连接
AMP 下 rtt 终端串口为 uart3
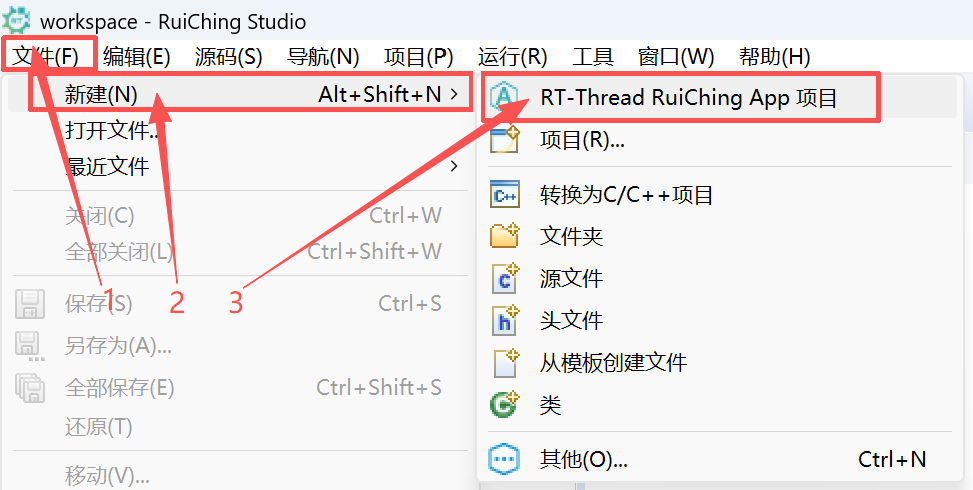
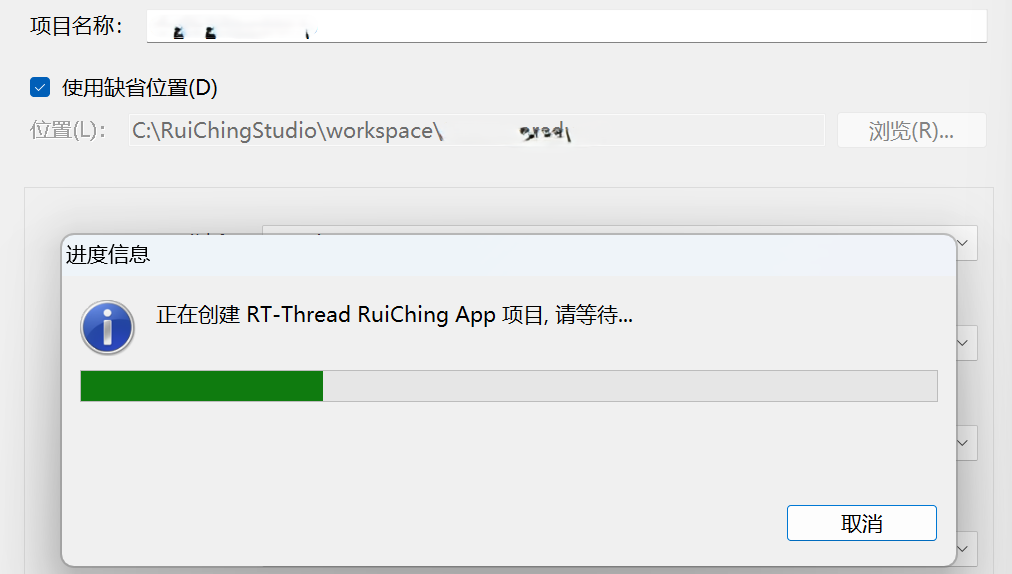
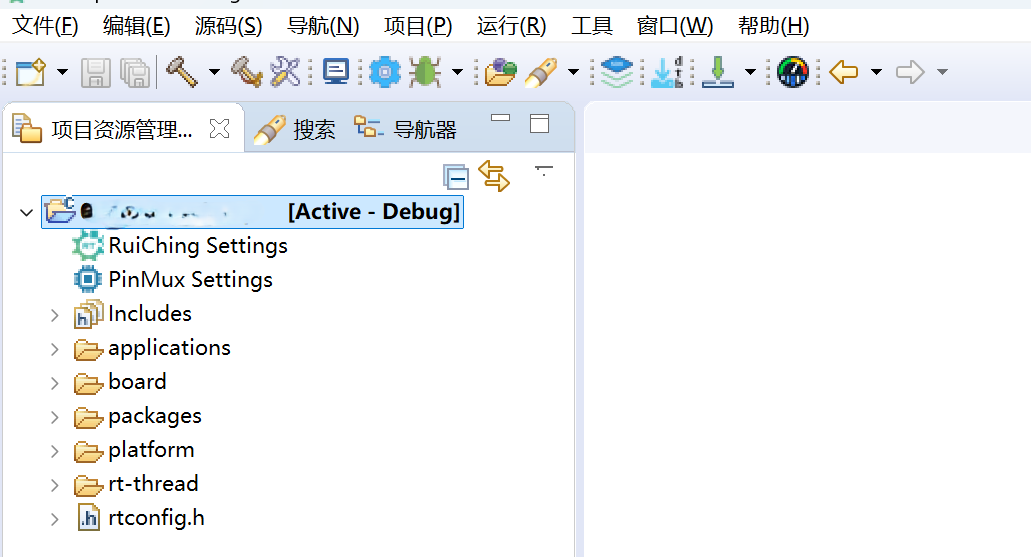
创建工程点击展开

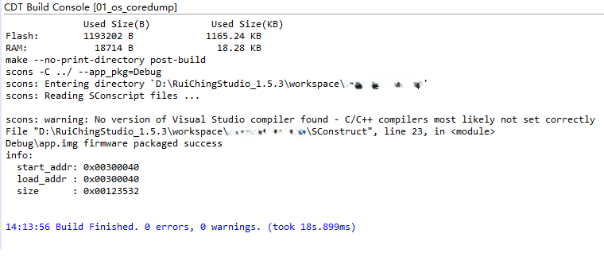
构建工程点击展开


固件下载点击展开


核心示例代码
AMP 示例相关 API
rt_device_open(rpmsg, RT_DEVICE_OFLAG_OPEN);:以可读可写的方式打开 rpmsg 设备;rt_device_control(rpmsg, RT_DEVICE_CTRL_CONFIG, &rpmsg_remote_echo):设置 rpmsg 的源目的地址rt_thread_create("rpmsg_echo", rpmsg_echo_thread, RT_NULL, THREAD_STACK_SIZE, THREAD_PRIORITY, THREAD_TIMESLICE);:创建 rpmsg_echo 线程rt_thread_startup(thread):启动 rpmsg_echo 线程
- 初始化和操作 rpmsg
int rpmsg_echo()
{
    uint32_t ret = RT_EOK;
    rpmsg = rt_device_find("rpmsg");
    if (rpmsg == RT_NULL)
    {
        rt_kprintf("Unable to find rpmsg device.\r\n");
        return RT_ERROR;
    }

    rt_device_open(rpmsg, RT_DEVICE_OFLAG_OPEN); // 打开 rpmsg 设备
    rt_device_control(rpmsg, RT_DEVICE_CTRL_CONFIG, &rpmsg_remote_echo); // 设置 rpmsg 源目的地址

    static rt_thread_t thread = RT_NULL;
    // 创建 rpmsg_echo 线程
    thread = rt_thread_create("rpmsg_echo",
                              rpmsg_echo_thread, RT_NULL,
                              THREAD_STACK_SIZE,
                              THREAD_PRIORITY, THREAD_TIMESLICE);

    if (thread != RT_NULL)
        rt_thread_startup(thread); // 启动 rpmsg_echo 线程

    if (ret != RT_EOK)
    {
        return RT_ERROR;
    }

    rt_kprintf("rpmsg echo init end.\r\n");
    return RT_EOK;
}- 创建 rpmsg 线程
struct rt_rpmsg_ep_addr rpmsg_remote_echo = {
    "rpmsg_chrdev", 0x3000U, 0x1000
};

static void rpmsg_echo_thread(void *parameter)
{
    rt_uint32_t len = 0;
    rt_uint8_t buff[BUF_SIZE];
    // 读取 linux 侧发来的 rpmsg 消息
    while ((len = rt_device_read(rpmsg, rpmsg_remote_echo.src, buff, BUF_SIZE - 1)) >= 0)
    {
        buff[len] = 0;
        rt_kprintf("message:%s len:%d\r\n", buff, len);
        // 给 rtt 侧发送相同的消息
        rt_device_write(rpmsg, rpmsg_remote_echo.dst, buff, len);
    }
}
运行示例
操作步骤
RT-Thread 和 Linux 建立
rpmsg通道上电启动后,RT-Thread 和 Linux 建立
rpmsg通道,才能做后续的发送消息,在 RT-Thread 侧串口的终端输入rpmsg_echo命令,然后能在 Linux 侧串口看到如下打印, 代表已经建立好rpmsg通道msh />rpmsg_echo [drv.rpmsg] rpmsg_chrdev is OK! src is 0x3000 dst is 0x1000 rpmsg echo init end. msh />root@rk3506-buildroot:/# [ 26.057352] virtio_rpmsg_bus virtio0: creating channel rpmsg_chrdev addr 0x3000 [ 26.057352] virtio_rpmsg_bus virtio0: creating channel rpmsg_chrdev addr 0x3000 root@rk3506-buildroot:/#Linux 和 RT-Thread 之间互发消息
在 Linux 侧串口的终端输入
rpmsg_echo命令,RT-Thread 侧看到的发送和接收消息日志root@rk3506-buildroot:/# rpmsg_echo Sending message #0: hello there 0!, len: 14 Receiving message #0: hello there 0!, len: 14 Sending message #1: hello there 1!, len: 14 Receiving message #1: hello there 1!, len: 14 Sending message #2: hello there 2!, len: 14 Receiving message #2: hello there 2!, len: 14 Sending message #3: hello there 3!, len: 14 Receiving message #3: hello there 3!, len: 14 Sending message #4: hello there 4!, len: 14 Receiving message #4: hello there 4!, len: 14 Sending message #5: hello there 5!, len: 14 Receiving message #5: hello there 5!, len: 14 Sending message #6: hello there 6!, len: 14 Receiving message #6: hello there 6!, len: 14 Sending message #7: hello there 7!, len: 14 Receiving message #7: hello there 7!, len: 14 Sending message #8: hello there 8!, len: 14 Receiving message #8: hello there 8!, len: 14 Sending message #9: hello there 9!, len: 14 Receiving message #9: hello there 9!, len: 14message:hello there 0! len:14 message:hello there 1! len:14 message:hello there 2! len:14 message:hello there 3! len:14 message:hello there 4! len:14 message:hello there 5! len:14 message:hello there 6! len:14 message:hello there 7! len:14 message:hello there 8! len:14 message:hello there 9! len:14