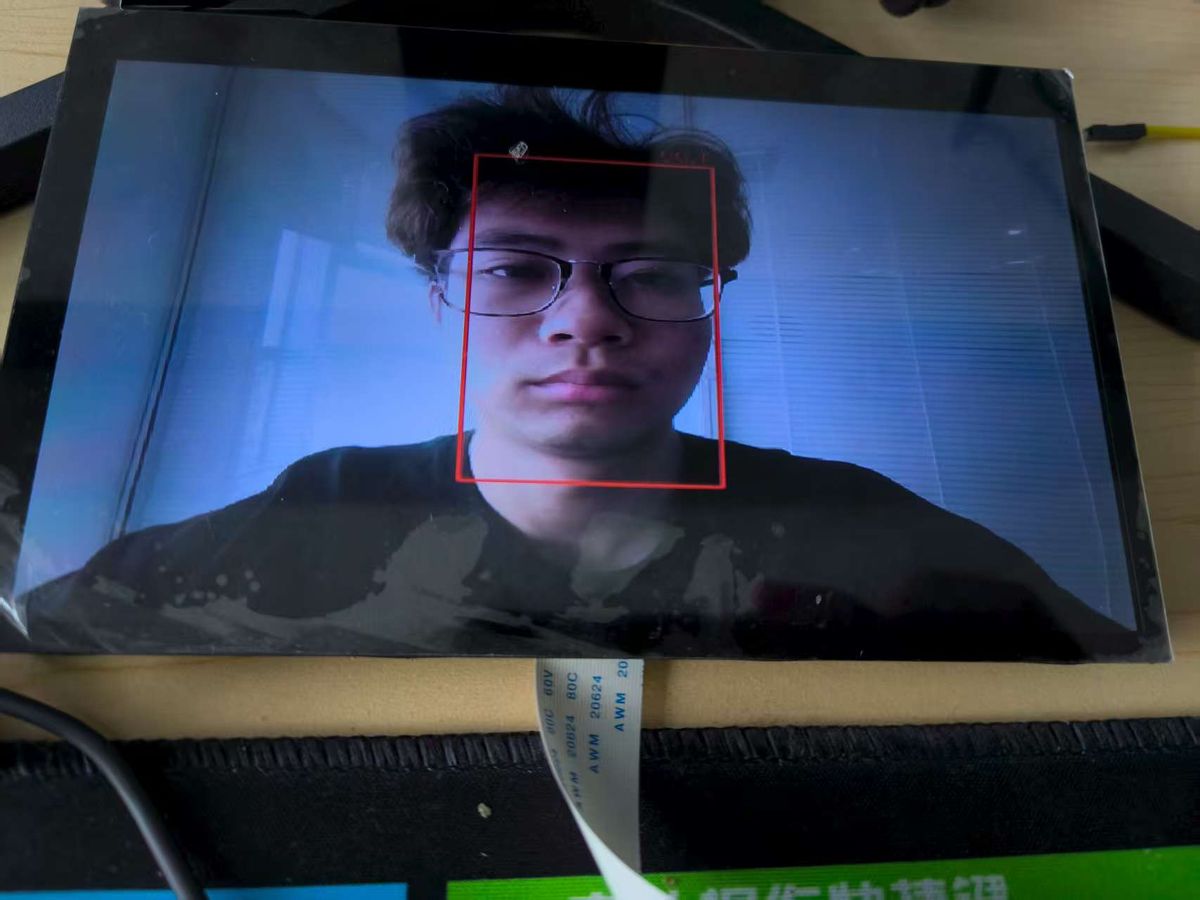
外观
摄像头人脸检测
本文介绍了如何在 RuiChing Studio 中创建一个 uvc_yolo_video 示例工程,并将其编译后在开发板上运行。旨在帮助读者熟悉使用摄像头采集图像,在睿擎派部署YOLO进行人脸检测并显示到 7 寸屏幕的流程。
YOLO 算法简介
YOLO(You Only Look Once)是一种实时目标检测算法,它将目标检测任务转化为一个回归问题,通过单个神经网络直接在图像上预测边界框和类别概率。这种方法速度快,能够在保证一定准确率的同时实现实时检测,广泛应用于安防监控、自动驾驶等领域。
硬件连接
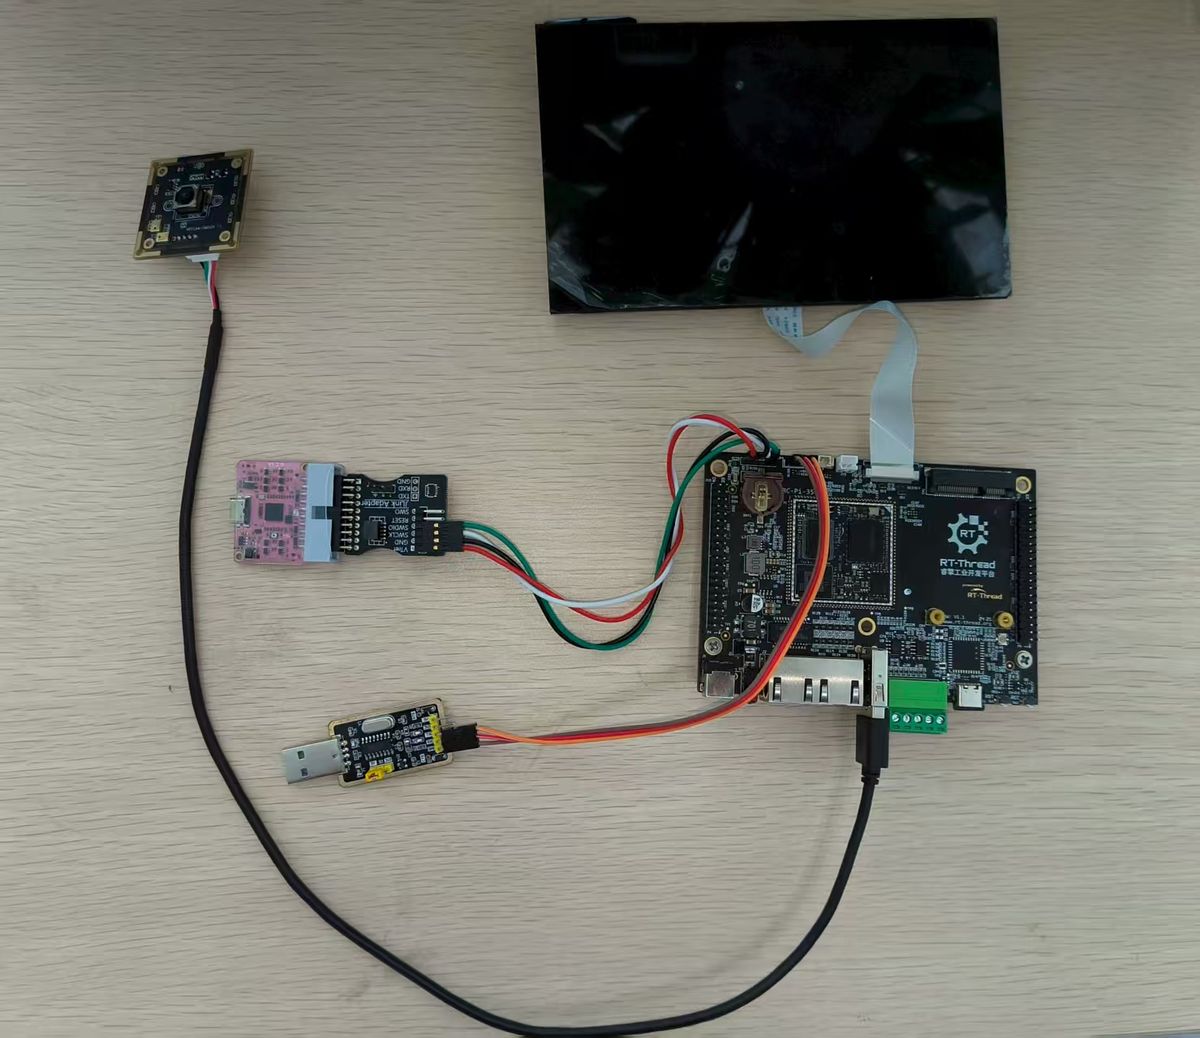
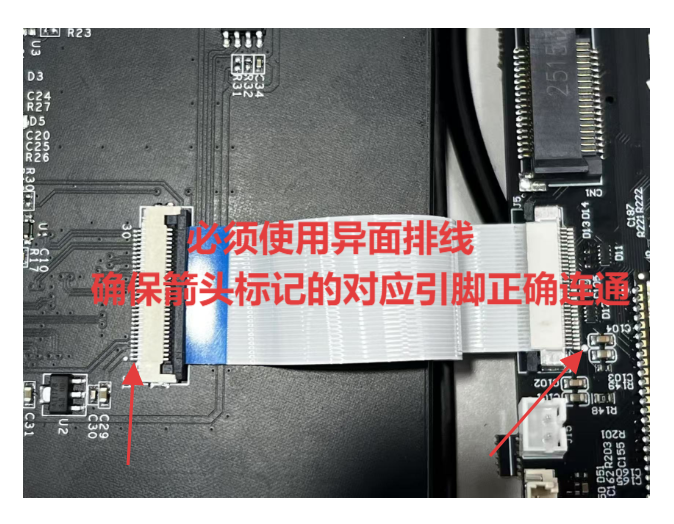
开发板连接 uvc 摄像头和 7 寸屏幕,注意屏幕连接线的方向。
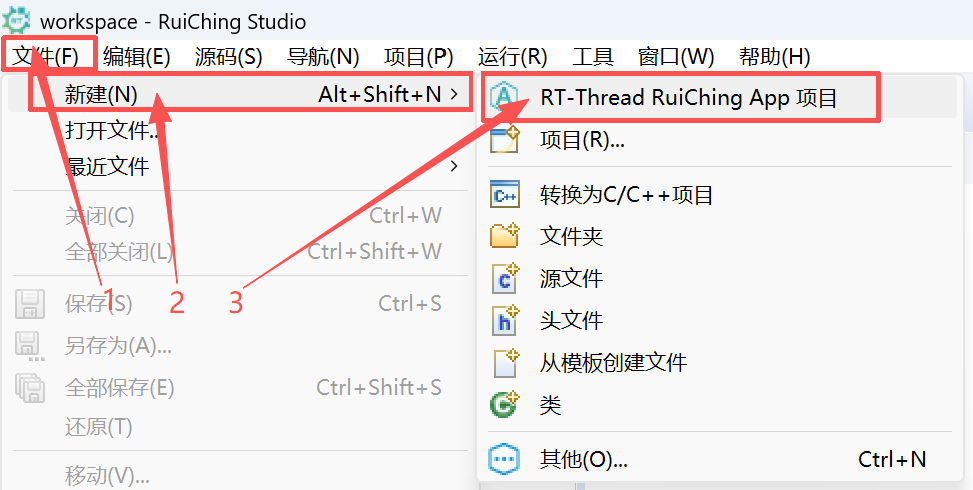
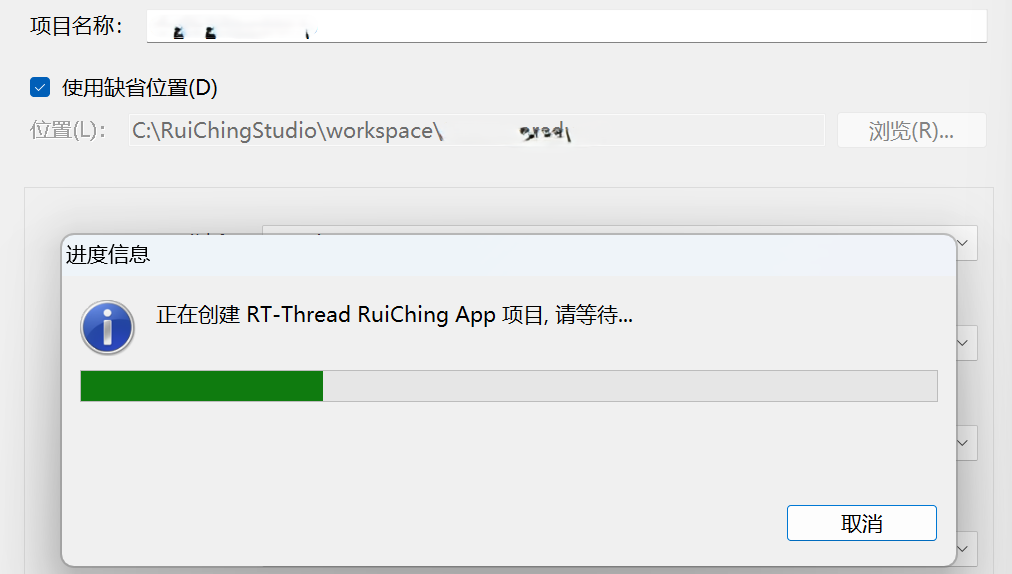
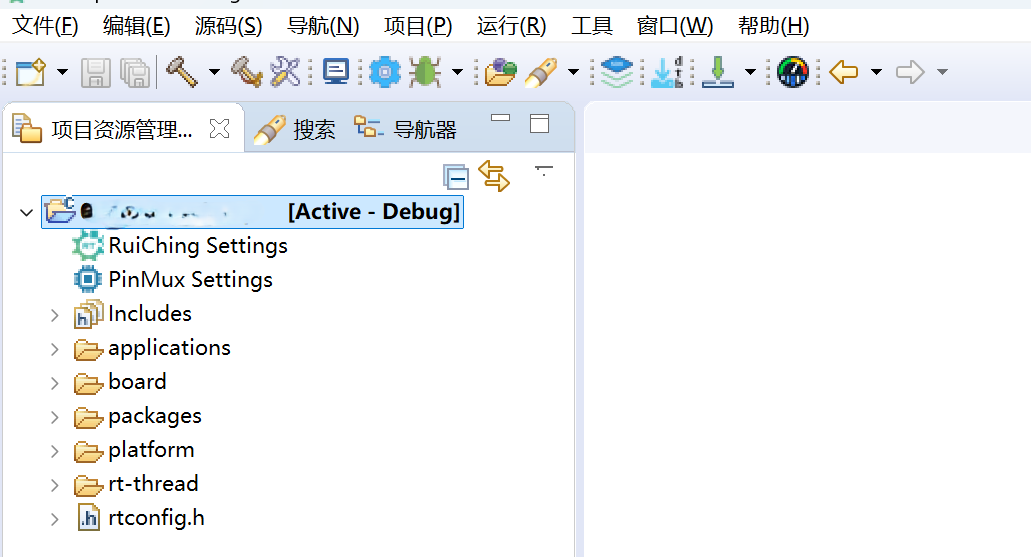
创建工程点击展开

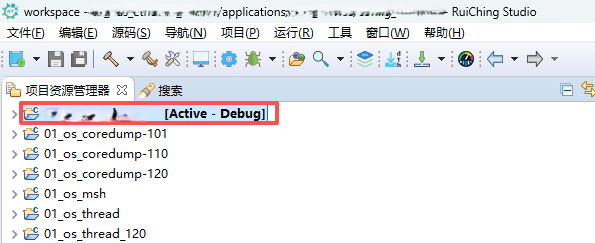
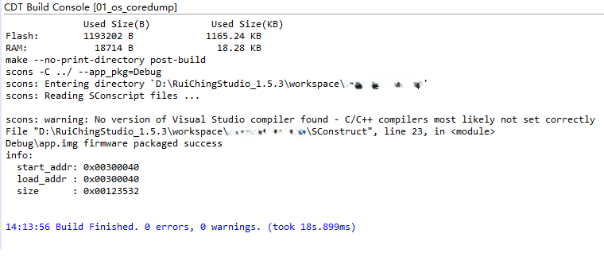
构建工程点击展开

固件下载点击展开


核心示例代码
yolo 示例相关代码
cv::imdecode:将内存中的二进制数据(通常是图像文件的字节流,如 JPG、PNG、BMP 等格式的原始数据)解码为 OpenCV 的 Mat 图像矩阵,以便进行后续的图像处理;detect:接收一张 OpenCV 格式的图像 (cv::Mat),通过 YOLO 模型进行目标检测,最终返回经过非极大值抑制 (NMS) 处理后的目标框坐标;visualize_to_buf:接收原始图像、检测到的目标框列表,在图像上绘制置信度最高的目标框及置信度值,然后将处理后的图像编码为指定格式(如 JPEG),并存储到全局缓冲区中。rgb_nearest_scale:通过最近邻插值算法,将输入的 RGB 图像数据按照指定的目标宽高进行缩放,并将结果存储到输出缓冲区中;rt_device_control:控制 LCD 设备刷新图像。
static int uvc_ai_start(void)
{
    uint8_t type = 1;

    if (init_lcd_device() != RT_EOK)
        return -RT_ERROR;

    uvc_device = rt_device_find("uvc");

    if (!uvc_device)
    {
        rt_kprintf("Can't find device uvc\n");
        return (-RT_ERROR);
    }

    rt_kprintf("uvc capture mjpeg type picture\r\n");

    frame_callback_t my_callback = my_function;
    rt_sem_init(&sem_lock, "lock", 0, RT_IPC_FLAG_PRIO);

    rt_device_init(uvc_device);
    rt_device_open(uvc_device, RT_DEVICE_FLAG_RDWR);

    rt_device_control(uvc_device, RT_UVC_CTRL_SET_CALLBACK, (void *) my_callback);
    rt_device_control(uvc_device, RT_UVC_CTRL_START_STREAM, &type);

    rt_kprintf("Initializing YOLO model...\n");
    global_yolo = new YOLONCNN("/tmp/model2.param", "/tmp/model2.bin");
    if (!global_yolo)
    {
        rt_kprintf("Failed to initialize YOLO model\n");
        return (-RT_ERROR);
    }

    is_streaming = RT_TRUE;

    while (is_streaming)
    {

        rt_sem_take(&sem_lock, RT_WAITING_FOREVER);
        uint time_start = rt_tick_get();

        std::vector<uchar> img_vec;
        if (g_global_frame != nullptr && g_global_frame->frame_buf != nullptr && g_global_frame->frame_size > 0)
        {
            img_vec.reserve(g_global_frame->frame_size);
            img_vec.assign(g_global_frame->frame_buf, g_global_frame->frame_buf + g_global_frame->frame_size);
        }
        else
        {
            rt_kprintf("The frame data is invalid and cannot be stored in vector\n");
        }
        cv::Mat img = cv::imdecode(img_vec, cv::IMREAD_COLOR);

        if (img.empty())
        {
            rt_kprintf("Failed to read captured image: %s\n", file_path);
        }
        else
        {
            auto boxes = global_yolo->detect(img);

            bool encode_success = global_yolo->visualize_to_buf(img, boxes, ".jpg", 90);
            if (!encode_success)
            {
                rt_kprintf("The image encoding to the buffer failed!\n");
                return -1;
            }
        }

        struct jpeg_input_ctx jpeg_ctx = { .jpeg_data = g_img_buf, .jpeg_size = g_img_size, .offset = 0, };

        JDEC jdec;
        JRESULT res = jd_prepare(&jdec, input_func, tjpgd_work, JD_WORKSPACE_SIZE, &jpeg_ctx);
        if (res != JDR_OK)
        {
            rt_kprintf("[UVC] jd_prepare error: %d\n", res);
            return -RT_ERROR;
        }

        int src_w = MJPEG_SRC_WIDTH;
        int src_h = MJPEG_SRC_HEIGHT;
        size_t needed = (size_t) src_w * src_h * 3;

        if (needed > dec_rgb_buf_size)
        {
            if (dec_rgb_buf)
                rt_free(dec_rgb_buf);
            dec_rgb_buf = (uint8_t *) rt_malloc(needed);
            if (!dec_rgb_buf)
            {
                rt_kprintf("[UVC] alloc dec_rgb_buf failed\n");
                return -RT_ERROR;
            }
            dec_rgb_buf_size = needed;
        }

        res = jd_decomp(&jdec, output_func, 0);
        if (res != JDR_OK)
        {
            rt_kprintf("[UVC] jd_decomp error: %d\n", res);

            return -RT_ERROR;
        }

        int dst_w = lcd_info.width;
        int dst_h = lcd_info.height;
        size_t need_scale_size = (size_t) dst_w * dst_h * 3;

        if (need_scale_size > scale_buf_size)
        {
            if (scale_buf)
                rt_free(scale_buf);
            scale_buf = (uint8_t *) rt_malloc(need_scale_size);
            if (!scale_buf)
            {
                rt_kprintf("[UVC] alloc scale_buf failed\n");
                return -RT_ERROR;
            }
            scale_buf_size = need_scale_size;
        }

        rgb_nearest_scale(dec_rgb_buf, src_w, src_h, scale_buf, dst_w, dst_h);

        for (int y = 0; y < dst_h; y++)
        {
            uint8_t *dst_row = lcd_fb + ((dst_h - 1 - y) * lcd_info.pitch);
            uint8_t *src_row = scale_buf + y * dst_w * 3;
            memcpy(dst_row, src_row, dst_w * 3);
        }

        rt_device_control(lcd_device, RTGRAPHIC_CTRL_RECT_UPDATE, RT_NULL);

        uint time_end = rt_tick_get();
        float fps = (1000.0f / (time_end - time_start));
        rt_kprintf("fps: %.2f\r\n", fps);

        if (g_img_buf)
        {
            rt_free(g_img_buf);
            g_img_buf = NULL;
            g_img_size = 0;
        }
    }

    return RT_EOK;
}
运行示例
操作步骤
准备
使用 FTP 服务,将applications\model目录下的model2.bin和model2.param存入开发板 tmp 目录,FTP 的使用方法见 FTP 服务器。。成功后进入 tmp 目录可以看到两个文件。
msh />ls
Directory /:
dev                  <DIR>
mnt                  <DIR>
tmp                  <DIR>
data                 <DIR>
sdmmc                <DIR>
msh />cd tmp
msh /tmp>ls
Directory /tmp:
model2.param         30017
model2.bin           578900
msh /tmp>
运行
启动开发板,运行程序后,终端输入uvc_ai_start命令将测试图像传入系统,程序会调用 YOLO 模型进行人脸检测,并持续打印检测类别(index:0 即人脸)和帧率。
msh />uvc
uvc
uvc_at_start
msh />uvc_at_start
[UVC] initialized: 1024x600, pitch=3072
uvc capture mjpeg type picture
uvc path exist
[T/USB] open oflag = 3
[T/USB] uvc_contrl cmd = 0
[T/USB] uvc_control cmd = 1
File path set to: /sdmmc/output.jpg
Initializing YOLO model...
[I/usb_video] EP=81 Attr=05 Mps=1024 Interval=01 Mult=02
[I/usb_video] Open video and select formatidx:1, frameidx:1, altsetting:7
[I/USB] uvc mps: 3072
[I/USB] start uvc stream...
index:0
fps: 5.10
index:0
fps: 5.03
index:0
fps: 5.05
index:0
fps: 5.03
index:0
fps: 5.21
查看检测结果